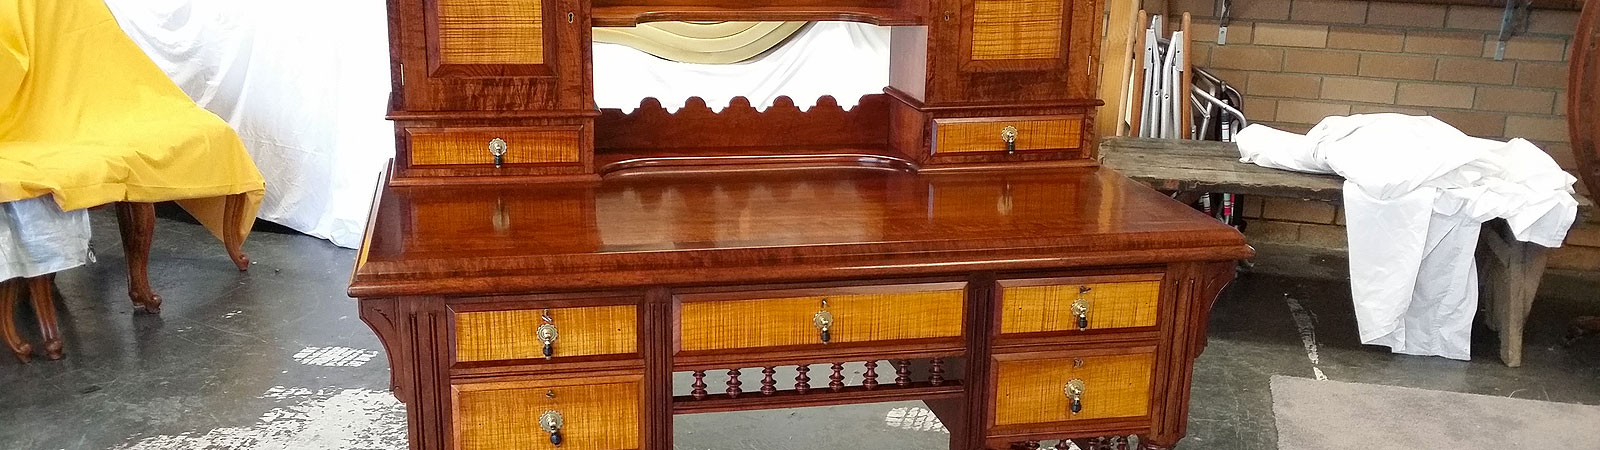
Steps To Stripping and Bleaching the Previously Stained Wood Furniture
In simple words, stripping furniture means removing the finish from wood furniture to apply a new fresh coat. Each piece of furniture is unique, and some may have finishes that are challenging to remove. It is certainly necessary to remove the original finish first if you intend to leave a piece of furniture natural and stain it afterwards. Here is how the stripping professionals of Hobart advise to strip and bleach the previously stained wood furniture.
Sanding
Remove the stain or varnish from your piece of furniture by sanding it first. To make the sanding in certain areas easier, if your piece has handles, take them off first. Use an orbital hand sander and 80-grit sandpaper to accomplish this. Be careful at the edges since if you apply this grit too vigorously or extensively, it will also shape your work. Follow up on your piece of furniture with 120-grit and then 220-grit sandpaper once the stain has been completely removed. This will make your piece of furniture more smooth. Wear your mask during this, please. Use a delicate cloth to remove all of the sanding dust after the sanding is complete.
Stripper might be your best option if your stain is particularly difficult to remove or if you have spots that are difficult to access and where an orbital sander would not fit. Use a stripper designed for eliminating stains, adhere to the instructions on the container, and put on your safety gear.
Fill a glass jar with a small amount of bleach. To prevent oversaturation, dip a paintbrush into the bleach and rub it down the container's side. You don't get the piece of furniture to the point where it might deform in some places.
All over the piece of furniture, use bleach. If necessary, dip the paintbrush again. Allow the furniture to completely dry after it has been coated. Tip: Drying it out in the sun can lighten it even more by hastening the drying process.
To have a little more control over it, stay in the shade. If it still isn't light enough once it dries, add another layer of bleach. More bleach will further brighten it with each application. Even after the first coat, you'll see straight away how any overtones are removed and how much lighter it is.
Once the piece of furniture has reached the required level of lightness, the bleach needs to be neutralised to stop it from further eroding the wood. To accomplish this, combine 1 part vinegar to 3 parts water in a basin and use a fresh paintbrush (or a paintbrush that has been washed) to paint the places where the bleach was applied.
After using the bleach, the piece of furniture could feel harsh once more, which you'll also notice. This is due to the wood fibres being "exposed" to the bleach. This can be resolved with a brief and mild sanding with 220 grit paper. Make sure you use a delicate cloth to clean it once more.
Furniture Staining After Bleach
A fine colour will show up after bleaching with two coats. However, because the wood was completely exposed after the bleach, sealing with finishing wax could cause the colours to alter. After Deciding on Flagstone and using it all over the furniture. The furniture did become a little darker shade of brown, but it was still a mild, neutral brown without any red undertones. You should immediately wipe it back off after applying it. Having more control over the colour you're producing is the key to it all.
Putting Furniture Sealant
You shouldn't neglect this step if you want to avoid water stains, wear and tear, and scuffs on the furniture. Seal the furniture with wax since the colour of the furniture needs to be preserved without getting darker. The kind of wax you use is important! After spreading it evenly over the furniture with a rag and letting it sit for 15 minutes, buffing it out with a fresh rag was required. The furniture is now preserved to keep it looking new and it kept the lovely stain colour without affecting it.
Modernized Handles
Consider replacing the hardware or giving the existing ones a quick coat of spray paint to further modernise your piece of furniture. Unusual pieces are undoubtedly made possible by them.
There you have it, then! Although we have shared the steps for guiding you with a DIY for your experience yet best is not to try if you lack confidence. Call on the professionals for stripping and bleaching since they know every ins and outs like a master. They shall take the best care of your furniture.
Popular Blogs
-

What Are the Modern Upholstery Makeover...
15 Jul, 2024 -

How To Restore Antique Furniture From Ho...
05 Jul, 2024 -

Why & How To Rely On Locals For Furn...
12 Jun, 2024 -

How Do Reupholstering To Recover Dining...
28 May, 2024 -

How Furniture Finishing Techniques Eleva...
10 May, 2024 -
How To Assess & Restore Damaged Anti...
01 May, 2024
Post a Comment